Create your own Discord Bot
I’ve used Discord since I found Nishiro Fansub, because they usually work and chat in Discord. Since then, it has become the most messaging application of mine.
Some of the things that I find personally useful with Discord:
- It’s Free (fuck nitro)
- Ease of communication (Instant messaging)
- Moderated chats (permissions)
- Text & voice capabilities
- Chat bots
- Send file attachments
- Add friends/colleagues
- Streaming platform integration
Well, enough for intro
Preparation
First, you have to install Nodejs(lastest) because Discord.js library always update.
In Linux:
|
|
In Windows:
Go to this link and dowload the lastest Nodejs version.
Create application on Discord
Now you’ll need to create an application on Discord to make your bot work. The goal here is to get an authorization token for the bot so that Discord recognizes your code and adds it to the bot on its servers.
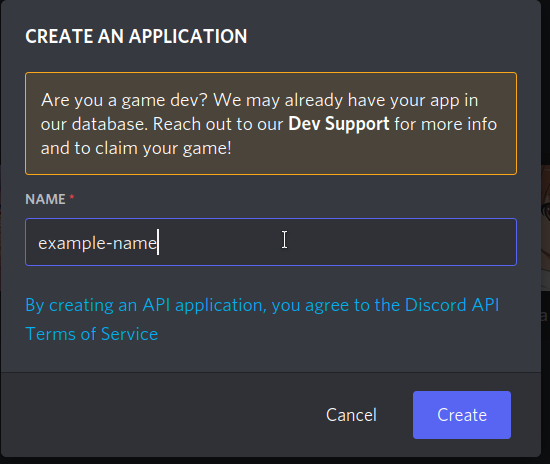
First, go to this link. Your account should be logged in, so you’ll go straight to your account’s list of applications. Hit New Application to get started.

Give the bot a name, then hit the button Create to Create New Application.

Active Bot and Get Token
Now look in left-navigation, you will see a tab called “Bot”, click there and hit the button Add Bot

After create bot, you will see Token section, click Reset Token and you’ll reveal a string of text. That’s your bot’s authorization token, which allows you to send it code. Don’t share it with anyone — that token allows whoever has it to create code for the bot, which means whoever has it can control your bot. Make sure you saved it to use later.
Now, in the left-navigation again, in OAuth2 tab, you will see URL Generator, hit there and tick the bot box, it’ll create a link to invite your bot into your own server, feel free to set Bot Permissions.
The final URL should look like this, but with your client ID number in it instead of this fake one: https://discordapp.com/oauth2/authorize?&client_id=000000000000000001&scope=bot&permissions=8
Copy the URL with your client ID number in it into your browser. That’ll take you to a website where you can tell Discord where to send your bot. You’ll know it worked if you open Discord in an app or your browser and navigate to your server. The channel will say a bot has joined the room, and you’ll see it on the right side menu under the list of members.
Code your own Bot
While you’re doing that, you can also take a moment to create a folder in an easy-to-reach place on your computer where you can store all your bot’s files. Call it something simple, like “DiscordBot” or “MyBot."
Now, just dowload Discord.js library.
|
|
First, create a new file called “config.json” to save the bot token
|
|
Then create a new file to code your Bot. Maybe index.js, but you may name it whatever you wish.
Base code example (Click the arrow to see the code):
|
|
Now, open your terminal and run node index.js to start the process. If you see “Ready!” after a few seconds, you’re good to go!
Some not useful example code
- Call some one code
|
|
- Ask bot time
|
|
- Set activity
|
|
Troubleshoot
Just contact me if you get any trouble.
If you find my blog helpful, please consider sponsoring <3
Sponsor